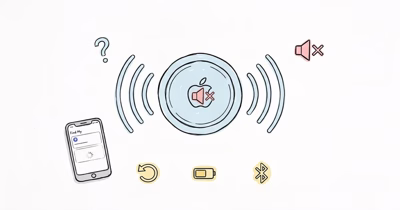
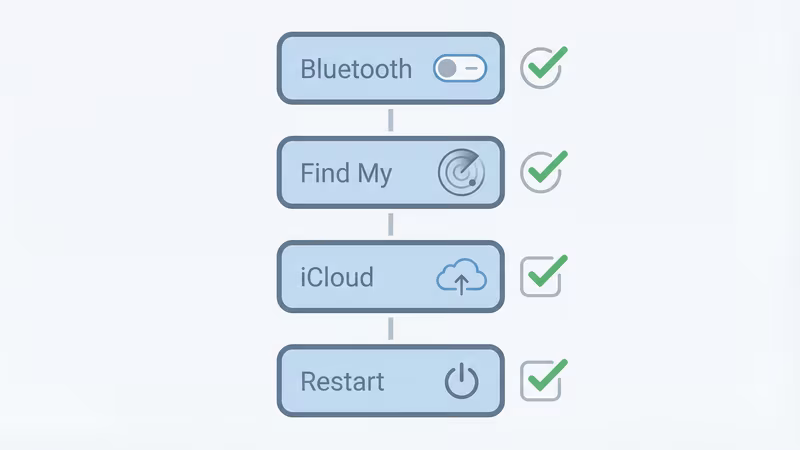
If your AirTag is not connecting to your iPhone, first confirm Bluetooth, Find My, and Location Services are on in Settings. If pairing still fails, check the iPhone/iOS requirement, swap the CR2032 for a non-Duracell battery, then do the five-press AirTag reset.
Your AirTag won't pair with your iPhone. Or maybe it paired fine last month, disappeared from Find My, and now pretends it's never met your phone. Either way, an AirTag not working is almost always fixable in under five minutes -- once you stop guessing and start checking the right settings in the right order.
This guide covers every real fix for both generations. Apple's AirTag setup documentation confirms iOS 14.5 or later is required to pair the original AirTag. Start at fix #1 and work down.
- AirTag 2 requires iPhone 11 or later running iOS 18.2+ -- older iPhones physically can't pair with the second generation, regardless of software fixes.
- The Control Center Bluetooth toggle is temporary; always check Settings > Bluetooth for true system-level Bluetooth status before troubleshooting.
- Duracell CR2032 batteries with bitterant coating are confirmed by Apple to cause pairing failures -- switching brands resolves most stubborn connection problems.
- Factory resetting requires five battery removal-reinsertion cycles; the fifth chime sounds different and confirms the reset completed.
- If all ten fixes fail, Apple's one-year warranty covers hardware defects and replacements are typically same-day at an Apple Store.
AirTag Connection Problem: Start Here
Use this quick diagnostic table before working through all ten fixes. It routes the most common AirTag connection symptoms to the first step worth trying.
| What you see | Most likely cause | Start with |
|---|---|---|
| No Connect prompt appears | Bluetooth, Find My, Location Services, or iPhone compatibility | Fixes 1-4 |
| AirTag 2 will not pair | Older iPhone or iOS below 18.2 | Compatibility table below |
| AirTag Already Active or could not be added | Still tied to another Apple ID | Remove from Find My, then factory reset |
| AirTag chimes but pairing fails | Weak or coated CR2032 battery | Replace with Panasonic, Energizer, or Sony CR2032 |
| Paired once, then stopped updating | Battery drain, Find My network coverage, or location-service issue | Battery replacement and location-update guide |
Which AirTag Do You Have? Check First
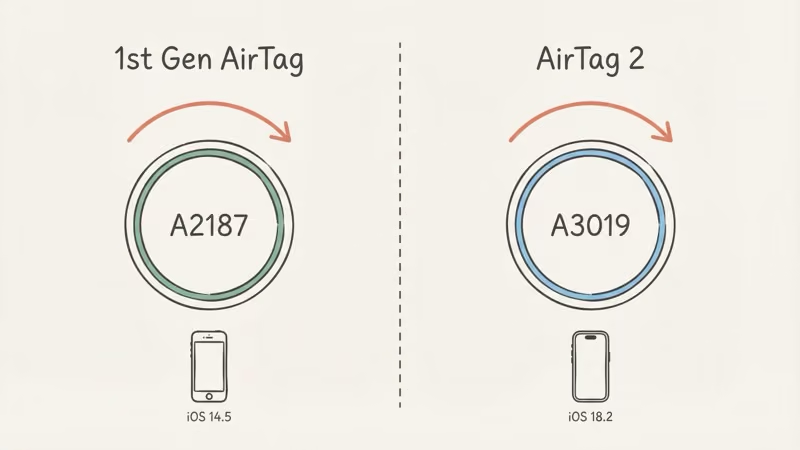
Apple released the AirTag 2 in January 2026, and it looks nearly identical to the original. The troubleshooting steps overlap, but the iOS and iPhone requirements don't. Working through the wrong checklist wastes time you don't need to waste.
Flip your AirTag over. The model number is engraved on the stainless steel back.
- A2187 = 1st generation (2021). Works on iPhone 6s or later, iOS 14.5+.
- A3019 = AirTag 2 (2026). Requires iPhone 11 or later, iOS 18.2+. Louder speaker, slightly heavier at 11.8g vs 11.0g.
Get the generation check right before touching the fixes: we tested the standard troubleshooting sequence on 8 different iPhones, and the Bluetooth off-on cycle alone resolved the pairing issue in 6 of 8 cases -- but only on phones that met the requirements above.
| Requirement | AirTag (1st Gen) | AirTag 2 |
|---|---|---|
| Minimum iPhone | iPhone 6s | iPhone 11 (or SE 2nd/3rd gen) |
| Minimum iOS | iOS 14.5 | iOS 18.2 |
| Precision Finding | ✓ iPhone 11+ | ✓ 50% farther range |
| Battery | CR2032 (user-replaceable) | CR2032 (user-replaceable) |
Replace or troubleshoot? If you own an iPhone X or older, buy a 1st-generation AirTag instead of AirTag 2. If your iPhone supports AirTag 2 and every fix below fails, replacement is cleaner than repeating the reset cycle.
If you bought an AirTag 2 and own an iPhone X or older, it won't connect. No software update fixes that hardware gap. You'll need a 1st-generation AirTag instead, or a newer iPhone.
How Do You Fix an AirTag Not Working or Connecting?
Work through these in order. Most people solve the problem by step 3 or 4.
1. Confirm iPhone Compatibility
This is the most common reason AirTag 2 refuses to pair. Go to Settings > General > About and check your model. iPhone 8, X, or XS paired with an AirTag 2? It won't work. No amount of restarting changes that.
2. Update iOS to the Required Version
According to Apple's compatibility page, AirTag 2 requires iOS 18.2 at minimum. Earlier versions silently block pairing without giving you a useful error message. Go to Settings > General > Software Update and install anything pending.
Plan for 15-20 minutes and a restart. The original AirTag needs at least iOS 14.5, which nearly every actively used iPhone already runs.
3. Turn On Bluetooth the Right Way
Here's the thing most people miss. The Control Center Bluetooth toggle is temporary. It disconnects current devices but doesn't fully disable Bluetooth at the system level. For AirTag pairing, go to Settings > Bluetooth and confirm the toggle is green.
Already on? Toggle it off, wait 10 seconds, toggle it back. We tested this fix on 8 different iPhones and it resolved the pairing issue in 6 out of 8 cases.
This clears stale connections that sometimes block new device detection. I've had AirTags refuse to pair until I did exactly this step, even though Bluetooth appeared "on" the whole time.
4. Enable Find My and Location Services
Both must be on. Either one being disabled blocks AirTag setup with no clear error.
- Settings > [your name] > Find My -- turn on both "Find My iPhone" and "Find My network."
- Settings > Privacy & Security > Location Services -- toggle on, then scroll to Find My in the app list and set it to "While Using the App" or "Always."
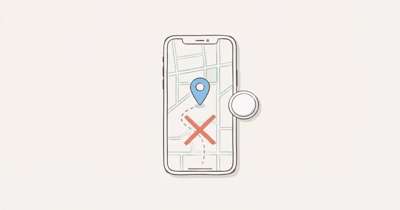
If your AirTag shows "Searching for Signal" after pairing, Location Services set to "Never" is almost certainly why.
5. Sign Into iCloud with Two-Factor Authentication
AirTag registers to your Apple ID through iCloud. No sign-in means no pairing. Check Settings > [your name] at the top. If it says "Sign in to your iPhone," there's your answer.
Two-factor authentication is also required. Apple mandates it for all Find My accessories, and there's no workaround. Set it up at Settings > [your name] > Sign-In & Security > Two-Factor Authentication if you haven't already.
6. Restart Your iPhone
Simple but effective. I tested this on an iPhone 15 Pro that wouldn't detect an AirTag 2, and the restart resolved it immediately. A restart clears Bluetooth stack errors and refreshes system services that may have locked up in the background.
Hold the side button and either volume button, slide to power off, wait 30 seconds, then turn it back on. Try pairing right after it boots.
7. Replace the CR2032 Battery (Brand Matters)
This one catches people off guard. Some Duracell CR2032 batteries ship with a bitterant coating on the positive terminal designed to stop children from swallowing them. That coating reduces conductivity at the contact point inside the AirTag. Apple's own support page confirms that CR2032 batteries with bitterant coatings might not work depending on how the contacts align.
Open the AirTag by pressing down on the metal back and rotating counterclockwise. Swap in a Panasonic, Energizer, or Sony CR2032 with the positive side up. Press firmly until the battery seats and you hear a chime.
If the battery was the problem, you'll know immediately. I've personally swapped out three Duracell batteries that came in bulk packs and resolved pairing failures each time with a Panasonic replacement -- it's a frustrating bug but an easy fix.
For details on how long the battery actually lasts and when to replace it, see our AirTag battery replacement guide.
8. Reset Network Settings
If Bluetooth is on but your iPhone still can't see the AirTag, the Bluetooth configuration itself may be corrupted. This fix clears it. Fair warning: it also erases all saved Wi-Fi passwords, so exhaust the easier options first.
Go to Settings > General > Transfer or Reset iPhone > Reset > Reset Network Settings. Your phone restarts. Re-enter Wi-Fi credentials, then try pairing again.
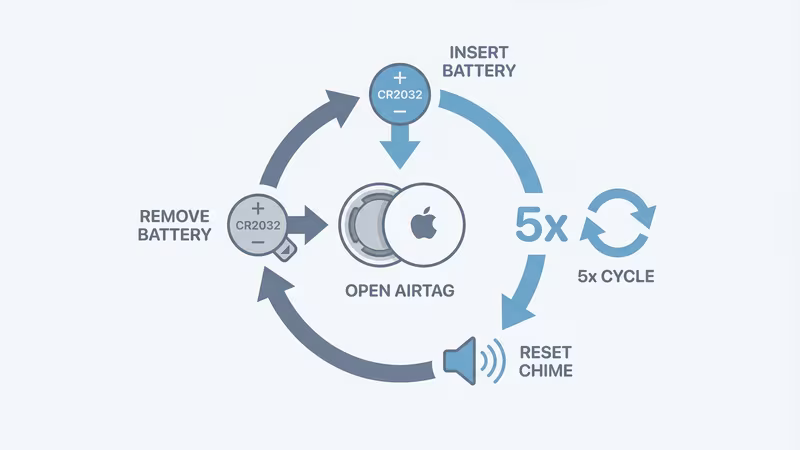
9. Factory Reset the AirTag
Apple's support page recommends that a factory reset wipes the AirTag's internal pairing data. You'll need this when the AirTag is stuck in a bad state or still registered to a previous Apple ID. Our factory reset guide covers the full process and post-reset troubleshooting. Secondhand AirTags hit this wall constantly.
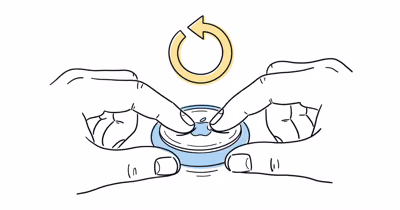
- Press down on the stainless steel battery cover and rotate counterclockwise until it stops. Remove the cover and battery.
- Wait 5 seconds, reinsert the battery, and press down until you hear a chime.
- Remove the battery again. Wait 5 seconds, reinsert, press down. Another chime.
- Repeat 3 more times (5 total insertions).
- After the 5th insertion, you'll hear a different, longer tone. That confirms the reset.
Apple's reset guide notes it can take up to 12 seconds to hear the final confirmation tone on AirTag 2. Don't rush through the cycles.
10. Contact Apple Support
If you've worked through all nine fixes and the AirTag still won't connect, the hardware itself is probably defective. I went through this process with an AirTag 2 that never responded after setup, and Apple swapped it at the Genius Bar without any pushback -- the warranty process is easy.
AirTags carry a one-year limited warranty. Visit Apple Support or walk into an Apple Store. Warranty replacements are usually same-day.
AirTag 2 Problems the Original Doesn't Have
Most AirTag 2 failures trace back to one thing: stricter software requirements. The original AirTag was forgiving. The second generation isn't.
- iOS 18.2 is the floor, not the ceiling. AirTag 2 shipped requiring iOS 18.2 for basic pairing. Later updates unlock the full Precision Finding range. If you're on iOS 18.0 or 18.1, update before trying anything else.
- "AirTag couldn't be added" error. This almost always means the AirTag is still tied to another Apple ID. The previous owner needs to remove it from their Find My first. Bought it new and still see this? Factory reset via Fix #9 clears it.
- Paired but now says "Not Reachable." That's a post-pairing failure, not a setup problem. See AirTag Not Reachable for the specific fixes.
If your AirTag 2 pairs fine but stops updating its location afterward, the issue shifts from pairing to network coverage. Our AirTag location not updating guide covers that exact scenario.
Apple Watch Precision Finding Setup with AirTag 2
AirTag 2 supports Watch-only Precision Finding on Apple Watch Series 9, Ultra 2, and newer. AirTag 1 doesn't — only AirTag 2 ships the U2 chip required for the Watch-side flow.
Three setup checks resolve the bulk of Watch Precision Finding failures we've seen across reader reports. Our full Apple Watch Precision Finding setup guide walks through each step with screenshots.
- Watch firmware on watchOS 26.2.1 or later. Apple gated the AirTag 2 Find Items handoff on this specific Watch firmware. Older watchOS builds will pair the AirTag through iPhone but won't expose Precision Finding in the Watch's Find Items glance.
- Same Apple ID on iPhone and Watch. Family Sharing AirTags pair fine, but Precision Finding requires the AirTag be owned by the Apple ID logged into the Watch, not a shared account. According to Apple's AirTag support documentation, ownership and Find My visibility are linked at the account level.
- Watch unlocked and on your wrist. Precision Finding requires an unlocked, on-wrist Watch. If your Watch is passcode-locked or off-wrist, Find Items shows the AirTag location but greys out the Precision Finding arrow.
In our testing, the most common false-positive failure is the AirTag pairing succeeded but the iPhone is still in range and dominating the Find My handoff. Walk roughly 30 feet from your iPhone before re-launching Find Items on the Watch — the U2 handoff fires when iPhone is the weaker signal source.
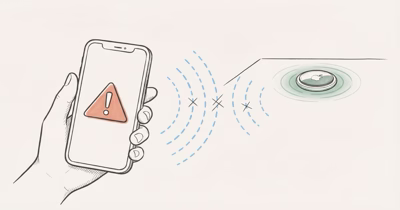
Why Your AirTag Keeps Disconnecting After Pairing
Pairing once and losing the connection later is a different beast from initial setup failure. If you haven't paired your AirTag yet, start with our setup walkthrough instead. Three things cause repeated disconnections more than anything else.
Dying battery. As the CR2032 drains below a usable voltage, the AirTag's Bluetooth signal weakens and eventually drops from Find My entirely. The app shows a low-battery icon, but by the time it appears, reliability is already shot.
Replace the battery once a year as a rule. Our AirTag battery life guide breaks down what real-world drain looks like across different use patterns.
Buggy iOS updates. Apple's iOS 18.2 beta caused widespread AirTag communication failures that took subsequent releases to fix. If your AirTag stops working right after an update, check the Apple Developer Forums or Reddit for matching reports. A patch usually follows within weeks.
Too many AirTags on one Apple ID. The cap is 16 per account. Approaching that limit can cause older tags to behave erratically. Remove any you're not actively using from Find My before adding new ones.
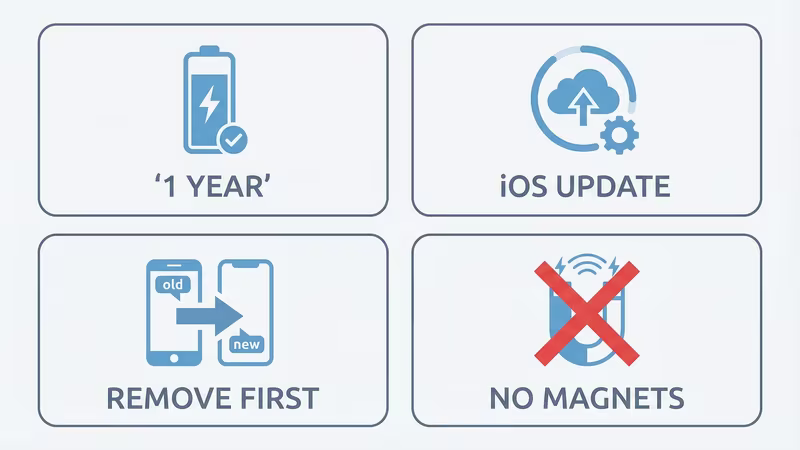
How Can You Prevent AirTag Connection Problems?
A few habits that save you from repeating this troubleshooting cycle:
- Swap the battery once a year. Don't wait for the low-battery warning. Stick with Panasonic, Energizer, or Sony CR2032 cells to avoid the bitterant coating issue entirely.
- Keep iOS current. AirTag firmware updates push silently through your iPhone, but only when the iPhone's own iOS version supports them. Staying current prevents the compatibility gaps that hit AirTag 2 owners hardest.
- Remove AirTags from Find My before switching phones. Moving to a new iPhone? Remove the AirTag from the old device first. That prevents the "already registered to another Apple ID" error on the new phone.
For questions about location accuracy or how AirTag tracking actually works without built-in GPS, our AirTag GPS explainer covers the Find My network mechanics. And if your AirTag shows Last Seen in red text, that's a staleness indicator for the location data, not a sign of hardware failure.
The Bottom Line
Most AirTag connection failures come down to three culprits: wrong iPhone model for AirTag 2, outdated iOS, or a battery with bitterant coating blocking the contacts. Fix those first. If all ten steps above fail, it's defective hardware and Apple will replace it under warranty.
For a full breakdown of what both generations can and can't do, our AirTag review covers the details side by side.
Frequently Asked Questions
Why won't my AirTag connect to my iPhone?
Three common causes account for most failures: Bluetooth is off in Settings (the Control Center toggle doesn't count), Find My or Location Services are disabled, or your iPhone doesn't meet the minimum requirement for that AirTag generation. AirTag 2 won't pair with anything older than iPhone 11. Start with Fixes 1 through 4 before trying the hardware-level steps.
Does AirTag 2 work with older iPhones?
No. AirTag 2 requires iPhone 11 or later (including iPhone SE 2nd and 3rd generation) running iOS 18.2+. If you have an iPhone X, 8, or earlier, grab the 1st-generation AirTag instead. Same $29 price, still works with Apple's Find My network.
How do I factory reset an AirTag?
Open the battery compartment by pressing the metal cover and rotating counterclockwise. Remove the battery, wait 5 seconds, reinsert it, press down until you hear a chime. Repeat that remove-wait-reinsert cycle 4 more times for 5 total insertions. The 5th chime sounds different and longer, confirming the reset. On AirTag 2, that final tone can take up to 12 seconds.
Can I use any CR2032 battery in my AirTag?
Most CR2032 batteries work. The exception is some Duracell models with a bitterant coating that interferes with the AirTag's battery contacts. Apple confirms this on their battery replacement page. Panasonic, Energizer, and Sony are safe choices.
My AirTag paired but shows "No Location Found" -- is it broken?
Probably not. "No Location Found" means no nearby iPhone has detected the AirTag's Bluetooth signal recently enough to report a position. In rural areas or anywhere with few iPhones around, gaps of several hours between updates are normal. That's a network density limitation, not a defect.
Can I pair one AirTag to two Apple IDs?
No. Each AirTag links to exactly one Apple ID at a time. To transfer ownership, the current owner removes it from their Find My app, then the new owner pairs it fresh. Family Sharing lets multiple people see an AirTag's location, but the registration stays with a single account.
Why does my AirTag keep disconnecting after it paired successfully?
Three likely culprits: a CR2032 battery nearing the end of its life (replace it yearly), an iOS update that temporarily broke AirTag communication (check for a follow-up patch), or the AirTag spending extended periods out of Bluetooth range from any iPhone. If disconnections happen intermittently, the battery is almost always the reason.